TL;DR
Water gets in at a flashing, penetration, or seam, then runs along the underside of the roof deck or a rafter until it hits the lowest point and drops. By the time you see the stain on your ceiling, the actual entry point is usually three to fifteen feet uphill from there. To find a roof leak, you trace the path backward. Start at the stain, map it to the exterior, then work up-slope checking every penetration and flashing you pass. Most San Diego leaks live at one of four spots: a corroded pipe boot, salt-eaten step flashing, a cracked or slipped tile near a roof jack, or a dam of leaf debris behind a skylight or chimney.
Why leaks don’t show up where they enter
If you’ve stood under a ceiling stain and pointed straight up to the roof above it, you’ve probably already pointed at the wrong spot. Here’s why.
A modern asphalt or tile roof is layered. Water that defeats the top layer (shingle, tile, cap, flashing) lands on the underlayment. From there it follows gravity. It runs down the underlayment until it finds a fastener hole, a seam, or the edge of the deck, then it drips onto the plywood. The plywood absorbs and wicks. The water keeps moving along the underside of the deck or down a rafter until it hits an obstruction (a joist, a piece of blocking, a HVAC duct, a recessed light can) and finally drops onto the drywall. For more on this, see 2026 tile roof replacement cost in San Diego.
That path can be short. On a low-slope roof with a leak near a vent, you might find the stain almost directly under the source. But on a steep San Diego cut-up roof with hips and valleys, water can travel ten or fifteen feet from where it entered before it ever shows up inside. We’ve chased leaks that traveled over twenty feet along a top plate before dropping at a can light.
This is why “how to find a roof leak” is its own skill, separate from “how to repair a roof leak.” If you fix the wrong spot, the leak comes back. That’s the single most common reason homeowners call us after a DIY repair. The patch held. The leak was somewhere else.
For the underlying cause categories, our piece on what causes roof leaks in San Diego covers the why. This one is about the where.
The 5-step diagnostic process
This is the standard sequence a roofer runs on a service call. It works on shingles, tile, and flat roofs with minor variations.
Step 1. Map the ceiling stain to interior coordinates
Stand under the stain. Pick the darkest point (that’s almost always the drip point, the lowest spot on the underside of the framing). Then measure.
You want two numbers: distance from the nearest exterior wall, and distance from the nearest perpendicular exterior wall. So if the stain is six feet from the east wall and eleven feet from the south wall, write that down. Take a phone photo of the stain with a measuring tape in frame.
If you can get into the attic, do this same measurement from above. Find the drip point on the underside of the deck (it’ll be the wet spot, the dark spot, or the spot with a rust trail on a nail), then measure from the rafter ends back to the source side. Mark the rafter with a piece of tape.
Step 2. Find what’s directly above on the exterior
Now go outside. Using your interior measurements, find the exact spot on the roof that’s directly above the stain. A laser distance tool helps but a tape measure works.
This is your starting point, not your answer. The actual source is almost always up-slope from here. The exception is dead-flat roofs (true low-slope membrane), where the water doesn’t travel much.
Step 3. Look up-slope from that point
Stand at your marked spot and look uphill toward the ridge. Everything between you and the ridge is suspect. On a typical pitched San Diego home, that’s a fan-shaped zone roughly three to fifteen feet wide and as long as the rafter run.
Walk that zone with your eyes (or with binoculars from the ground if you’re not on the roof). You’re looking for anything that interrupts the plane of the roof. Every interruption is a flashing, and every flashing is a potential leak point.
Step 4. Check every penetration up-slope
Penetrations are where roofs leak. In our service area, the order from most-common to least-common cause is roughly:
| Penetration / Detail | Why it leaks in San Diego |
|---|---|
| Plumbing vent pipe boot | UV degrades the rubber gasket. Inland zip codes (Escondido, Santee, Poway) see this most. 8 to 12 year lifespan. |
| Step flashing at sidewalls | Coastal salt corrodes galvanized step flashing from underneath. Often hidden by stucco or siding. |
| Skylight perimeter flashing | Sealant fails on the up-slope side, water gets behind the curb. |
| Chimney cricket / counter-flashing | Debris dams behind the chimney, water backs up under shingles. |
| Tile slip or crack | Foot traffic from HVAC techs and solar installers breaks tiles. Common around rooftop AC units. |
| Roof jack / vent cap | Caulk-only seal fails. Should have a metal flange. |
| Valley | Debris dam (especially in eucalyptus and pepper-tree neighborhoods like Bonita, Fallbrook, parts of Rancho Santa Fe) backs water sideways under shingles. |
| Drip edge / rake edge | Missing or short drip edge lets wind-driven rain wrap under the first course. |
| Solar mount penetrations | Lag-bolt sealant fails or installer skipped the proper flashing kit. |
| Cap shingles at ridge | Brittle, wind-lifted, or nailed wrong. |
Walk up-slope and check each one. You’re looking for:
- Cracks in rubber boots, especially the upper third of the cone where sun hits hardest
- Rust streaks or pinholes in metal flashing
- Open sealant joints (a dime-sized gap is enough)
- Slipped, cracked, or missing tiles
- Debris piles, leaf mats, moss
- Lifted shingle tabs, especially up-slope edges
- Daylight visible from inside the attic (look while someone shines a light from above)
Pipe boot leaks and flashing leaks each have their own deep-dives if you want the full breakdown of those two specifically. On tile roofs, our common causes of tile roof leaks piece covers the slip-and-crack pattern.
Step 5. Attic check during rain (or with a controlled hose test)
If steps 1 through 4 don’t give you a confident answer, the next move is to watch water come in.
The cleanest version is during active rain. Get in the attic with a flashlight and watch the underside of the deck. Trace the water back from the drip point uphill until you find where it’s actually emerging from the plywood. Mark that spot. Then drive a thin nail or push a wire up through that spot, so when you’re back on the roof you can find the corresponding exterior location.
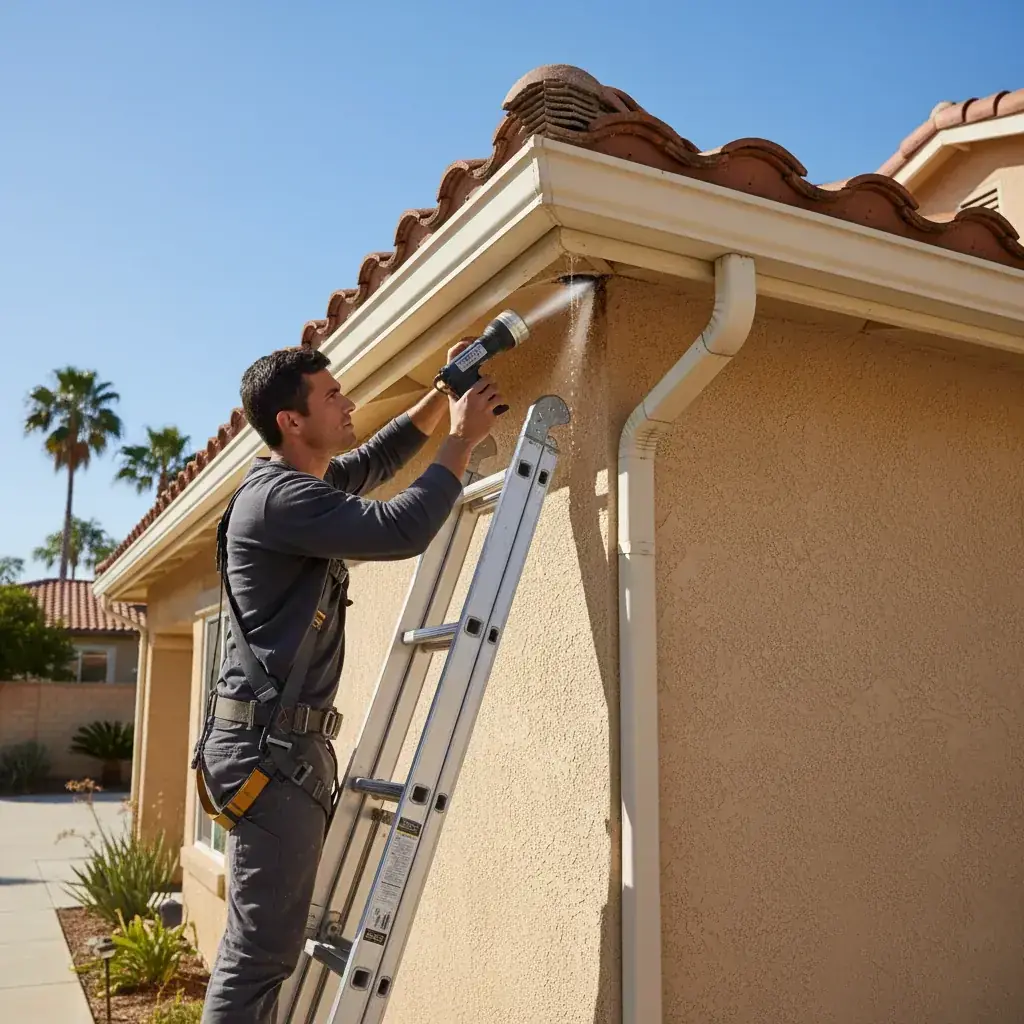
The second version is a controlled hose test. You’ll need a helper. One person on the roof with a garden hose, one person in the attic with a flashlight and a phone for communication. Start the hose at the lowest part of the suspect zone and work uphill in five-minute soaks. Eaves first, then each course of shingles, then each penetration. Do not skip courses. The moment water shows in the attic, you’ve found the entry zone. Stop the hose, mark both spots.
Hose-testing in dry conditions has limitations. Wind-driven rain can defeat details that pass a vertical hose test. If a leak only shows during a storm, it’s often a wind-driven entry at a rake edge, ridge vent, or sidewall step flashing.
Tools you’ll need
You don’t need professional gear for diagnostics. You need basic gear used carefully.
| Tool | Purpose | Cost |
|---|---|---|
| Bright flashlight (1,000+ lumens) or headlamp | Attic work, peering into shadows | $20 to $60 |
| 25-foot tape measure | Mapping interior stain to exterior roof | $15 |
| Painter’s tape + Sharpie | Marking rafters, deck spots, exterior tile locations | $10 |
| Phone camera | Documenting every step. Critical for insurance. | Already have it |
| Sturdy extension ladder rated to your weight + 50 pounds | Roof access | $150 to $400 |
| Garden hose with adjustable nozzle | Controlled hose test | Already have it |
| Moisture meter (pin or pinless) | Confirming wet zones in drywall or sheathing | $30 to $80 (optional) |
| Binoculars | Ground inspection of upper roof areas you can’t safely reach | $30 to $100 |
| Soft-soled shoes (no boots on tile) | Roof traction without breaking tiles | Already have them |
Skip the infrared cameras and the moisture-mapping gadgets. They’re useful for pros doing thermal sweeps, but for a single-leak diagnosis they’re overkill and easy to misread.
Common false positives
Not every ceiling stain is a roof leak. About one in four “roof leak” service calls we get in San Diego turn out to be something else. The most common false positives:
| Interior symptom location | Likely non-roof source |
|---|---|
| Bathroom ceiling under a second-floor bathroom | Toilet wax ring, shower pan, or plumbing supply line |
| Kitchen ceiling | Upstairs sink or dishwasher supply, or refrigerator line |
| Hallway ceiling with no fixture | Often roof, but check HVAC condensate line in the attic above |
| Ceiling near an exterior wall, especially after fog | Stucco intrusion or window head flashing, not the roof |
| Ceiling directly below an attic with no insulation gap | Condensation from warm humid attic hitting cold drywall |
| Stain that only appears in summer | HVAC condensate overflow, not rain |
| Stain in a closet against an exterior wall | Window or door flashing failure, water tracking inside the wall |
The tell for a real roof leak: it correlates with rain. If your stain shows up after a rainstorm and not after a fog night, not after running the dishwasher, and not during AC season, you’re looking at a roof leak. If it shows up at other times too, broaden the suspect list before you climb up there.
The condensation case is especially tricky in older Mira Mesa, Clairemont, and University City homes with low-R-value attics. Warm moist interior air hits the cold underside of the deck in winter, drips onto insulation, and stains the ceiling. It looks exactly like a leak. The tell is that it shows up after a cold clear night, not after rain.
When the source is in the attic vs. on the roof
Sometimes the water never came through the roof at all. Sources commonly found in the attic:
- HVAC condensate drain pan overflow (the pan rusts through, water hits insulation)
- HVAC condensate line clogged with algae, backing up at the secondary pan
- Plumbing vent stack joint failure inside the attic
- Bath fan duct disconnected, dumping warm humid air against the cold deck
- Recessed light can leaking conditioned air into the attic, condensing on the deck above
- Hot water heater in an attic closet (yes, this happens), pan rusted through
If you get up there and the leak source is below the deck, you save yourself a roof repair. Document where the water is coming from, photograph it, and call the right trade. Often that’s a plumber or HVAC tech, not a roofer.
How to do a hose test safely
The hose test is the most reliable diagnostic move you can make, but it’s also the most dangerous part of the process. Some rules.
Two people. Always. One on the roof, one in the attic. No exceptions on anything above a single story.
Start low, move up. If you start at the ridge and work down, you’ve contaminated the whole roof with water and you can’t isolate which detail failed.
Five-minute minimum per zone. Water takes time to travel the path we described above. If you spray a flashing for 30 seconds and move on, you’ll miss it.
Document. Phone video of where you’re spraying, timestamps, and what the attic person sees. This is invaluable if you end up filing a claim. (Our homeowners insurance and roof leaks piece covers what California carriers want to see.)
Stop at the first hit. Once you confirm the source, stop spraying. You don’t need to test the whole roof. You need to find one leak. Wet roofs are slick, especially tile.
If the roof is steeper than 6:12, has tile, has solar that interferes with foot paths, or is anything above a single story without proper edge protection, do not do this yourself. The hose test is the moment most homeowner roof injuries happen. We see the call a few times a year. It’s not worth it.
When to call a pro
Honest version: most homeowners can run steps 1 through 4 from this guide. Step 5, the on-roof hose test, is where it gets dicey.
Call a pro if:
- Roof is steeper than 6:12 (you can’t comfortably walk it without sliding)
- Roof is tile (concrete or clay both crack under foot traffic if you don’t know where to step)
- House is two stories or more
- You don’t have a ladder rated for the height plus a 3-foot extension above the eave
- You can’t get safely into the attic (no attic access, no walkable joists, low clearance)
- You’ve already located the suspect zone but the leak is at a complex detail (chimney, skylight curb, valley termination)
- You’re seeing more than one stain (multiple sources or a single source feeding multiple paths)
- The leak is active during a storm and you need it stopped now (that’s an emergency roof repair situation)
A diagnostic visit usually runs $150 to $350 in San Diego. If the diagnostic leads to a repair we do, we credit that toward the repair. That math almost always beats DIY when you factor in ladder rental, time, and the risk of patching the wrong spot. More on the repair side of that decision in our DIY vs pro repair piece, and on what a repair actually involves at roof repair.
Documenting for insurance
If there’s any chance you’ll file a claim, document as you go. Don’t wait until you’re on the phone with the carrier.
What to capture:
- Photos of the interior stain with a measuring tape showing distance from walls
- Photo of the same stain with a date/time stamp (most phone cameras do this automatically)
- Photo or video from the attic showing the drip point and the path back to the source
- Photo of the exterior penetration or detail where water enters
- A close-up of the failed component (cracked boot, rusted flashing, slipped tile)
- Date of the storm event and approximate inches of rainfall (NOAA San Diego data is free)
- Any previous repair records for that roof
California carriers will reject claims faster than you can blink if the damage looks like long-term wear instead of a single covered event. The documentation above is what separates “sudden and accidental” from “deferred maintenance.” Our insurance coverage guide walks through what California carriers cover and what they don’t.
San Diego specifics worth knowing
Coastal (anything west of the 5, plus the bayfront): salt air eats galvanized step flashing from underneath. The shingle or stucco looks fine, but the flashing behind it is rusted to pinholes. We pull a lot of intact-looking sidewalls in La Jolla, Ocean Beach, and Coronado that have nothing but rust paper behind them. The full breakdown on the best roof material for coastal climates goes deeper.
Inland (Escondido, Santee, Poway, El Cajon, Ramona): UV destroys pipe boots. The neoprene cone cracks at the top, water runs straight down the pipe into the attic. This is the single most common single-source leak a qualified roofer will repair in inland zip codes.
Tile roofs anywhere: foot traffic from HVAC service, solar install, satellite, and pest control breaks tiles. Most tile leaks turn up near rooftop AC units because the tech walked the wrong path. If you’ve had any rooftop work done in the last six months, that’s your first place to look.
Eucalyptus, pepper, pine, and oak neighborhoods (Fallbrook, Bonsall, Rancho Santa Fe, parts of Alpine, Mount Helix): debris dams in valleys and behind chimneys are the leading cause of leaks even on otherwise healthy roofs. The roof didn’t fail. The debris just refused to let water leave.
FAQ
How long can a roof leak go unnoticed before it causes serious damage?
Drywall shows staining within a few rain events. Decking starts to delaminate after a few months of repeated wetting. Framing rot takes a year or more but it’s the expensive damage. If you see a stain, find the source within the next dry window, even if it’s not actively dripping.
Why does my roof only leak in heavy rain, not light rain?
Almost always a wind-driven detail (rake edge, ridge vent, sidewall flashing) or a debris dam that only overtops in volume. Light rain hits the roof and runs off normally. Heavy rain backs up against the obstruction and finds a sideways path.
Can a leak come from above and travel to the other side of the house?
Yes, easily. Water follows the underside of the deck along whatever path gravity gives it. We’ve traced single leaks that crossed two rooms before dropping. This is why “directly above the stain” is rarely the answer.
Is it worth buying a moisture meter for one leak?
Probably not. They’re useful, but if you have a visible stain, you already know where the wet zone is. Save the $50 for a better flashlight or a pair of soft-soled shoes.
Should I tarp my roof before diagnosis?
If the leak is active and the forecast shows more rain, yes. A tarp buys you a dry roof for diagnosis. Just secure it with sandbags or 2x4s, never by nailing through the field of the roof. That creates new leaks.
What does it cost to have a pro diagnose vs. repair?
Diagnosis alone runs $150 to $350 in San Diego County. A confirmed-source repair (pipe boot, single flashing, a few tiles) runs $400 to $900. Complex repairs (chimney rebuild, skylight reseal, valley redo) run $1,200 to $3,500. If you patch the wrong spot yourself and the leak comes back, you’ll likely spend more total than if you’d called a pro the first time.
My ceiling is stained but I can’t find any wet spot in the attic. What now?
Three possibilities. The leak self-limits (only happens in specific rain conditions and the attic is dry between events), the path doesn’t go through the attic (water might be running inside an exterior wall from a stucco or window detail), or you’re looking at a condensation problem and not a leak. Hose-test the suspect roof area in five-minute zones. If nothing shows, broaden to non-roof sources.
What we do that homeowners can’t
Three things, mostly.
We’ve seen the failure modes hundreds of times. We know that a stain six feet in from a sidewall in Pacific Beach is almost certainly step flashing corrosion, not the field of the roof. That pattern recognition saves hours of testing.
A qualified roofer can walk steep and tile roofs safely with the right footwear, harness, and rope. The leak is rarely in a convenient spot.
A qualified roofer can pull a small section of roofing to confirm the source before a qualified roofer will repair, then put it back. That’s the difference between “we think it’s this” and “we found it.”
If you’ve worked through steps 1 through 4 and you’re stuck, or step 5 is past your comfort zone, that’s our call to make. We’ll find the source, document it, and either repair on the same visit or quote it.
If you’re in active emergency (water coming in right now, forecast says more), see emergency roof repair. For non-urgent leaks, see our San Diego roof leak repair service for full diagnosis and repair.
For deeper reference, the Insurance Institute for Business and Home Safety publishes roof performance research that lines up with what roofers report in the field, and the National Roofing Contractors Association maintains the technical bulletins that define how flashing details are supposed to be built. Both are worth a read if you want to go beyond troubleshooting into how roofs actually fail.