TL;DR
Step flashing is a series of small L-shaped metal pieces interleaved between shingle courses anywhere a sloped roof runs into a wall. Each piece sheds water out onto the shingle below it, like overlapping scales. It’s one of the most common leak sources in San Diego after pipe boots and chimney flashing, and it almost never gets repaired correctly the first time.
Coastal homes from Coronado up through Encinitas see galvanized step flashing perforate at 18 to 25 years. Inland homes get 25 to 30. Sealant-only repairs (the kind a handyman does in 20 minutes for $180) start leaking again within 12 to 18 months, and they make the real repair harder because the dried caulk has to be chipped out of every shingle course. The full breakdown on the best roof material for coastal climates goes deeper.
Honest repair pricing in San Diego sits between $450 for a short run with shingles intact and $1,800 for a full wall run with siding work and new underlayment. If a quote doesn’t mention lifting shingles back, it isn’t a step-flashing repair. It’s a band-aid.
How step flashing actually works
Step flashing is the piece of the roof that does the most work and gets the least respect. Most homeowners have never heard the term until they have a leak.
Each piece is a small rectangle of metal, usually 5 by 7 inches, bent at a 90-degree angle. The horizontal leg sits on top of a course of shingles. The vertical leg runs up the wall behind the siding. The next course of shingles is laid over the horizontal leg, and the next piece of step flashing overlaps the one below it by at least 2 inches.
The result looks like a staircase climbing up the wall, hence the name. Water that hits the wall above runs down, hits a step, and gets kicked out onto the shingle below. It never touches the wood sheathing because the metal is always under the next shingle up.
This is what makes step flashing different from every other type of flashing on your roof. It isn’t sealed. It isn’t glued. It works because of geometry. Done right, it lasts as long as the metal itself.
Where step flashing lives
Step flashing shows up anywhere a sloped roof meets a vertical wall. That includes more places than most people realize.
- Wall-to-roof transitions. Single-story sections that meet a two-story wall, like a garage attached to a tall main house, or a covered patio against the back of the home.
- Dormer sides. The two angled walls of any dormer have step flashing running up each side.
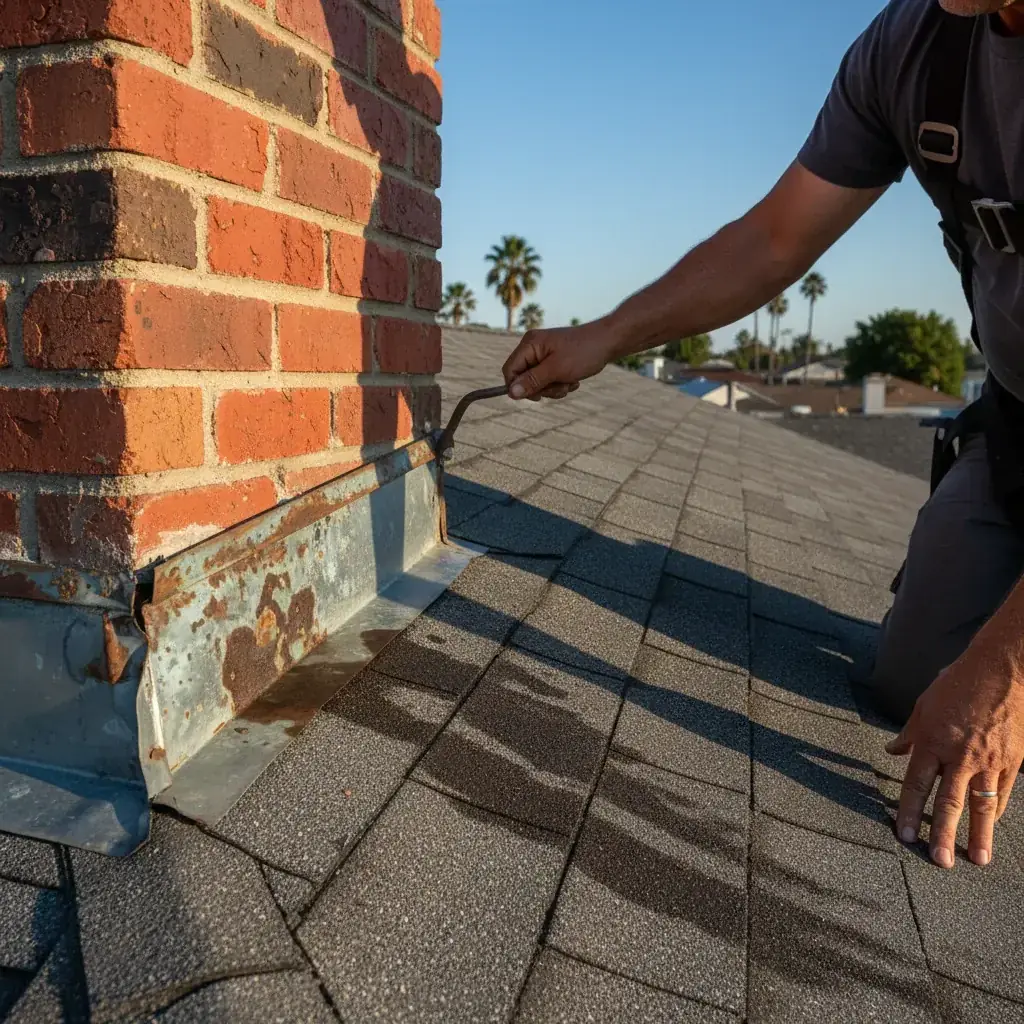
- Chimney sides. Step flashing runs up both sides of every chimney (the front and back use different details).
- Plumb-wall risers. Anywhere a roof butts into a parapet, knee wall, or stair-step wall in a multi-level home.
In San Diego, the highest concentration of step flashing per square foot tends to be on Cape Cod and traditional two-story builds in Carmel Valley, Scripps Ranch, and the older neighborhoods of La Mesa and Mission Hills. Mid-century ranches have less of it. Spanish-style tile homes use a different system (counter flashing into stucco), but still have step flashing underneath.
| Where it lives | Typical failure point |
|---|---|
| Wall-to-roof at a step-down | Bottom corner where step meets wall and shingle |
| Dormer sides | Mid-run where galvanized perforates first |
| Chimney sides | Top course where counter flashing terminates |
| Plumb-wall risers | Behind stucco patches that trapped moisture |
Why step flashing fails in San Diego
The failure modes here aren’t generic. They cluster around four causes, and most leaks come from a combination of two.
Salt-air corrosion of galvanized metal. Most homes built between 1985 and 2010 used G90 galvanized step flashing. The zinc coating gives sacrificial protection, but salt aerosol within five miles of the coast eats through it in roughly half the time the manufacturer claims. Step flashing in Coronado, Imperial Beach, Ocean Beach, La Jolla, Cardiff, and Encinitas commonly shows perforation by year 18 to 22. You can’t see this from the ground or a ladder. It only shows when shingles get lifted.
Sealant aging. Some original installs (especially from production builders in the 1990s) skipped step flashing entirely and used continuous L-flashing sealed with caulk. Polyurethane sealant has a published service life of 10 to 20 years, but UV exposure in San Diego cuts the lower end of that closer to 7. Once the bead cracks, water finds the gap.
Improper original install. This is more common than people want to believe. The two install errors that show up most often: step flashings butted end-to-end instead of overlapped by 2 inches, and pieces face-nailed through the front of the shingle below (which puts a hole in the waterproofing). Both pass a final inspection because they’re hidden. Both leak in 5 to 10 years.
Wind events. Santa Ana winds and the occasional winter storm can lift shingles and break the seal that holds them flat. Step flashing exposed to direct UV for even a few months ages faster, and the wind can fold the vertical leg outward where siding doesn’t hold it tight.
How to diagnose a step-flashing leak
Step-flashing leaks have a few telltale signs. They show up on the inside of the home, not the outside, because the failure point is under shingles.
- A water stain on the ceiling or upper wall that’s always within a few feet of where the roof meets a higher wall outside.
- Stains that appear only after sustained rain (not a brief shower), because step-flashing failure tends to need a few hours of water for the leak to wick down.
- Bubbling paint or warped baseboard at the second-floor base of an interior wall directly under a roof-to-wall transition.
- Mushy stucco or rotted siding at the bottom of a wall where it meets the lower roof.
Pipe boots and skylights leak quickly under a 10-minute shower. Step flashing usually doesn’t. If your leak only shows after a heavy storm, step flashing is the first place a competent roofer should look.
What real repair looks like
A correct step-flashing repair has six steps. If a contractor’s scope skips any of them, the leak is going to come back.
- Lift back the shingles in the affected run. Each course has to be carefully bent up and the sealant tabs separated without breaking the shingle.
- Strip the old metal. Every existing step flashing piece comes out. The face nails that pinned them in get pulled and the holes get sealed.
- Inspect and repair the sheathing. If water has been getting through for a while, the OSB or plywood underneath will show staining or soft spots. Soft sheathing gets cut out and replaced.
- Install new ice-and-water membrane up the wall behind where the flashing will go, lapping over the shingle below. This is the secondary waterproofing layer.
- Install new step flashing with the correct 2-inch overlap, nailed only through the top corner of the vertical leg (never through the horizontal leg into the roof deck).
- Reset the shingles with new sealant tabs and re-bed any that broke during the lift.
A repair that includes all six steps takes 4 to 8 hours for a short run, a full day for a long wall. A repair that takes 45 minutes isn’t a repair. It’s caulk.
Material options and lifespan
The material you choose for the new flashing matters more than most homeowners realize, especially within a few miles of the coast. Here’s what a qualified roofer will install and what to expect.
| Material | Coastal lifespan | Inland lifespan | Relative cost |
|---|---|---|---|
| Galvanized G90 steel | 18-22 years | 25-30 years | Baseline |
| Aluminum (.024-.032) | 30-40 years | 40-50 years | 1.3x |
| Stainless steel (304) | 50+ years | 50+ years | 2.5x |
| Copper (16 oz) | 60+ years | 75+ years | 4x |
For most San Diego homes, aluminum is the right call. It doesn’t corrode in salt air, it’s affordable, and it’s compatible with asphalt shingles. The exception: if your existing roof has copper anywhere else (gutters, chimney saddle, valley flashing), don’t mix metals. Galvanic corrosion between aluminum and copper will eat the aluminum in under 10 years. Match what’s already there or pick stainless. For more on this, see whether salt will damage a metal roof.
Within two miles of the ocean, we’ll often recommend stainless on critical runs (long dormer sides, chimneys, anywhere a re-roof would mean tearing out new shingles). The upfront cost is real, but you’re buying flashing that outlives the next two shingle roofs above it.
Cost ranges in San Diego
Pricing assumes a straightforward repair with normal access. Steep pitches over 8:12, two-story walls without a working tie-off anchor, or significant sheathing rot will push costs higher.
| Scope | Typical range |
|---|---|
| Short run (4-6 feet), aluminum, no sheathing damage | $450 - $750 |
| Medium run (8-12 feet), aluminum, partial siding work | $750 - $1,200 |
| Long run (15-25 feet), aluminum, new underlayment | $1,200 - $1,800 |
| Upgrade to stainless, any of the above | Add 25-40% |
| Sheathing replacement | Add $80-$150 per sheet |
These numbers assume the shingle roof above the flashing has at least 5 years of life left. If you’re inside the last 3 years of shingle life, repairing step flashing alone usually isn’t the right move. Talk through a re-roof timeline before you spend money on metal that’s going to come out soon anyway. We cover the broader cost picture in our roof flashing repair cost guide.
Why “caulk-over” never works
The most common bad repair goes like this. A handyman climbs up, sees a gap or some rust along the wall line, and runs a heavy bead of polyurethane or roofing tar across the top edge of the visible flashing. Sometimes they smear it across the shingle course too. Quote: $180 to $300. Time on the roof: 30 minutes.
Three things are wrong with this.
First, the leak isn’t at the top edge. It’s underneath, where the step pieces have either corroded through or were never overlapped correctly. Sealing the top traps water that gets in from above (driven by wind) and gives it nowhere to drain. The leak gets worse, not better.
Second, polyurethane on asphalt shingles bonds permanently for the first 6 to 18 months, then cracks as the shingle expands and contracts daily in San Diego’s UV. Once it cracks, every crack becomes a funnel pointing straight at your sheathing.
Third, when a real roofer eventually comes to fix it, every shingle in that run has to be replaced. The dried sealant won’t release, and the shingles tear when you try to lift them. What would have been a $700 repair becomes a $1,400 repair because you’ve added new shingles to the scope.
If anyone offers you a step-flashing repair without lifting shingles, the answer is no. Get a second opinion. The broader patterns of bad flashing work are covered in our piece on what causes most roof leaks in San Diego.
How to read a step-flashing repair quote
An honest quote names the failure. A bad one doesn’t.
Look for these line items: shingle lift-back, metal removal, sheathing inspection, ice-and-water membrane, new flashing material and gauge, shingle re-seating, sealant for the counter-flashing edge only (not the steps themselves), and disposal. If a quote is one line that reads “repair roof flashing leak, $400,” ask for the scope in writing.
Also check the warranty language. A repair done right gets a 5 to 10 year workmanship warranty on the flashing run. A repair done wrong gets 30 days or “no warranty offered.” That difference tells you what the contractor thinks of their own work.
California requires every roofing contractor to hold an active C-39 license from the Contractors State License Board (CSLB). Verify it before you sign anything. The license number should appear on the quote, the truck, and the business card.
The National Roofing Contractors Association publishes detailed guidance on flashing installation, including step flashing specifications. The NRCA Roofing Manual is the industry reference. A roofer who has read it will tell you the same things this article does.
Where San Diego homes show step-flashing trouble first
A few patterns repeat across the county.
Coastal salt zones (Coronado, Imperial Beach, Ocean Beach, La Jolla, Cardiff, Encinitas, Solana Beach, Del Mar). Galvanized flashing on any home over 18 years old should be assumed compromised until inspected. We cover this corrosion pattern in detail in our piece on coastal salt damage to San Diego roofs.
Older neighborhoods with original galvanized (Mission Hills, North Park, Kensington, La Mesa, parts of Hillcrest and South Park). Homes built before 2000 with original construction often have step flashing that’s past its expected service life. If you bought a 1950s or 1960s home and the roof was last replaced in the 1990s, plan on flashing work in the next reroof.
Two-story production homes in Carmel Valley, Scripps Ranch, Rancho Bernardo, and 4S Ranch from the 1990s and early 2000s often used continuous L-flashing with sealant instead of proper step flashing. These start leaking at the 15 to 20 year mark and need a full retrofit, not a patch.
FAQ
Can I repair just one piece of step flashing? Rarely. Step flashing fails as a system. If one piece has corroded through, the pieces above and below it are usually within a year or two of the same fate. Replacing one piece means lifting the same shingles you’d lift to replace the whole run, so it’s almost always smarter to do the full run while the shingles are open.
Do I need to replace the shingles too? Not usually. If the shingles are in good shape and less than 15 years old, a careful roofer can lift them, do the flashing work underneath, and reseat them with fresh sealant tabs. Some breakage is normal (5 to 10% in a typical run). If shingles are brittle, sun-baked, or past 18 years, plan on replacing what comes off.
Will my insurance cover step-flashing repair? Almost never for normal wear and corrosion. Insurance covers sudden, accidental damage (storm, fallen tree, etc.). Step flashing failing because galvanized metal corroded over 20 years isn’t a covered loss. If the failure is tied to a specific storm event with documented wind damage, file the claim and let the adjuster decide.
How long does step-flashing repair take? A short run (4 to 6 feet) takes a half day. A longer run with siding or stucco work can take a full day. Crews work weather windows tightly because the underlayment can’t sit exposed overnight in our marine layer.
Should I upgrade to aluminum or stainless if my flashing is still galvanized? If you’re within five miles of the coast and the roof has at least 10 years of shingle life left, yes. The cost upgrade is small relative to the labor, and you won’t have to repeat this repair in 8 years. Inland homes can stay with G90 galvanized if cost is tight, but aluminum is still the better long-term call.
Can step-flashing leaks cause structural damage? Yes, given time. Step flashing tends to leak slowly, so homeowners often don’t notice for one or two rainy seasons. By then, the wall sheathing, top plate, and sometimes the framing behind the siding can rot. We’ve opened walls where two seasons of slow leakage replaced 30 square feet of OSB and a 6-foot section of top plate. Don’t ignore stains.
Will a real estate inspection catch step-flashing problems? Sometimes. A good home inspector will note rust, gaps, or visible deterioration. They can’t lift shingles, so they won’t see corrosion under the laps. If you’re buying a coastal home over 15 years old, pay for a separate roof inspection that includes a lift-and-look on each flashed wall.
What to expect from a vetted roofer
When you call us about a suspected step-flashing leak, here’s what happens.
We’ll match you with a vetted San Diego roofer who starts with a free roof inspection that includes a hands-on look at every wall-to-roof transition. They lift shingles where the symptoms suggest the failure point, photograph what’s underneath, and show you the corrosion or installation defect on the spot. No scare tactics, no upsell. If your flashing is fine and the leak is from somewhere else, they’ll tell you.
If repair is needed, you get a written scope that names every step: shingle lift-back, metal removal, sheathing repair if any, new underlayment, new flashing material and gauge, shingle re-seating, sealant detail, disposal, and a 10-year workmanship warranty on the flashing run. Pricing is fixed before work starts, not “discovered” once the shingles are up.
Most repairs are scheduled within a week. Active leaks during the rainy season get same-day temporary tarp work, then permanent repair on the next dry window. The crew that quotes the job is the crew that does it.
For broader context on flashing problems, see our guides on chimney flashing repair and roof flashing leak repair. For the full service overview, visit our flashing and vent repair page.
If you’ve got a stain that shows up after big storms, or a water mark anywhere a low roof meets a tall wall, give us a call. Step flashing is fixable. Letting it sit isn’t.